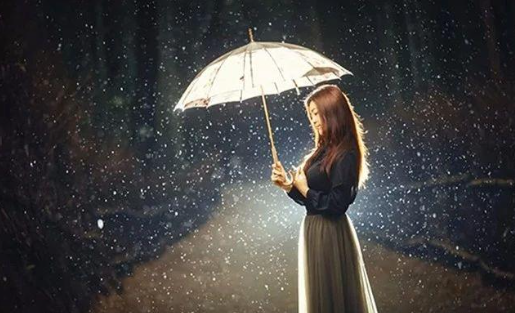
In this season, whether in the south or the north, there is always a lot of precipitation. The arrival of rain causes a lot of inconvenience to transportation and people's lives, but it can bring a lot of new opportunities for portrait photographers. Here's a share of the lighting skills for shooting beautiful portraits in rainy days. Friends who have shooting ideas can learn about them and practice them.
1. Required equipment
1. Off-camera flash. You need to light from multiple directions from the side and rear, and you need off-camera flashes that can be freely adjusted-possibly multiple more. If you have a high speed flash, it couldn't be better.
2. Soft box or soft umbrella. To pursue better light effects, you need a soft box or soft umbrella; The light of the former is "softer", while the light of the latter is more directional. Please choose yourself.
3. When shooting in the rain, waterproofing is also very important. Bring a lens with good water resistance (if available) and a waterproof cover; If it is really limited by conditions, colorless and transparent (or white) plastic bags will do.
2. Related settings
Flexibly adjust your shutter speed with the largest aperture. If you want to darken the background, you can use a shutter speed of 1/200 th second or even higher; If you want to preserve the ambient light, you can set it in the flash sync speed range.
Increases sensitivity. If shooting at night, you can also control the exposure effect of rain by adjusting the sensitivity. Generally, ISO 800 to 1000 is used. Use a white balance that matches the color temperature of the main light. This is especially important when you use color filters to change the color tone of the main light.
3. Basic skills
Whether it is backlight or side backlight, don't let the light source appear directly in the picture. Consider using the model's body for occlusion.

Flashes tend to illuminate the ground next to the model when providing lighting, distracting the viewer. To avoid this problem, you can place the lamp one meter away from the model and light it diagonally upward. If you want to shoot raindrops with a sense of existence, the flash should not be too far away from the model, and it is best not to exceed five meters.
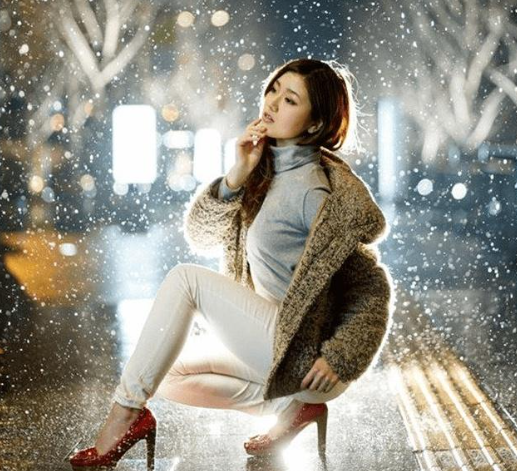
4. Lighting scheme
Point light silhouette
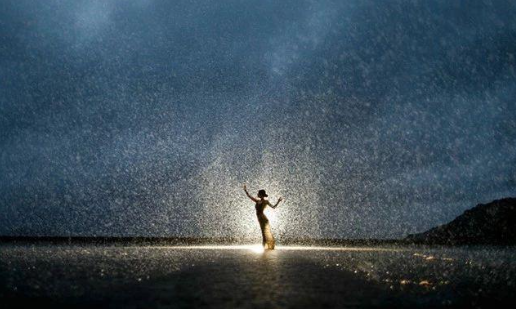
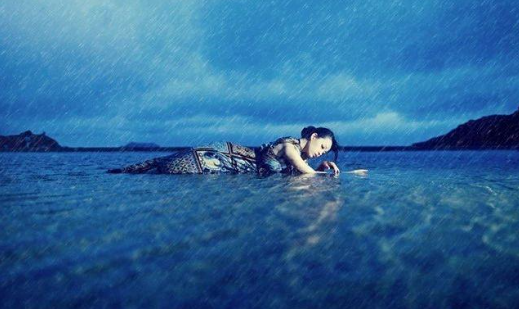
This is the most basic routine. Place the camera behind the model and silhouette/semi-silhouette the model with the "big backlight" and illuminate the raindrops in the air.
Point light source + reflection
Set the flash behind the model and use reflectors in her front or side to reflect the light onto her face. When shooting in an urban environment, you can also utilize surrounding environmental elements (such as walls) to achieve diffuse reflection of light.
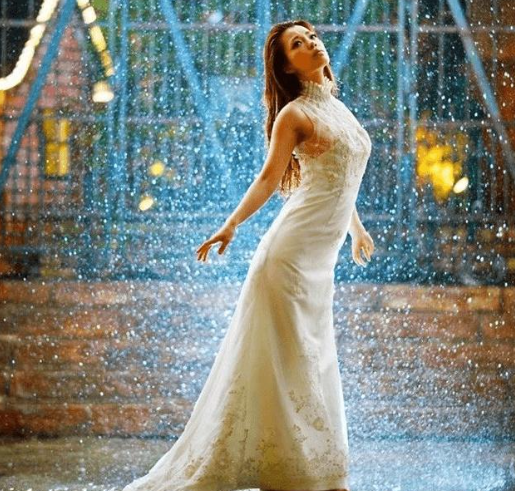
Additional light source
In addition to the main light behind the model, you can also use another flash group, or use light sources in urban environment (such as street lamps, window lights, etc.) to illuminate the model's face. You can light from the front to get a more even fill light effect, but this may lead to flat facial features; You can also light it from the oblique side to highlight the outline of the model and create a three-dimensional feeling, but shadows may appear on the face.
Cross-type lighting
This "ultimate" gameplay requires three sets of lights: the main light behind the model, and the lights on the left and right sides in front of the model, which can not only illuminate the whole face, but also use contour light to highlight the three-dimensional sense.
Another point to add is that RAW format must be used when shooting, so that there is more room to correct the exposure in the later stage, such as targeted improvement of the brightness of the model's face.