Photographers often discuss how the photos they take are always less sharp than those they see online. Of course, there are some factors that everyone understands, such as holding the camera steady, using the shutter cable and so on. But these are actually just some of the most basic methods.
In fact, every photographer often takes blurry photos, but people don't publish these photos! However, there are still some skills to take as few blurry photos as possible. Only by comprehensively applying these skills can we achieve a high success rate.
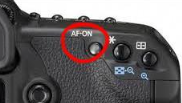
AF key of camera
Many photographers, especially novices, almost 90% of them don't know how to use this button that most cameras have. Most people focus by pressing the shutter halfway and then pressing the shutter to shoot. As a result, the camera will refocus every time you shoot. What happens if the object you want to shoot is far away, and there happens to be some foreground or backscene interference? At this time, I can't always focus on the subject to be photographed. I finally get in focus, and after a little composition, I get out of focus again.
Most of them have this "AF-On" button. Through menu settings, this button can be set as the focus button. In this way, as long as focusing is performed once during shooting, the focus point will stop at the same position, and the shutter key machine is only responsible for the shutter.
Single point focusing
As a photographer, you should learn to "tell the camera how to do it". Instead of just pressing the shutter halfway, the camera decides how to focus, although most of the time the camera will find the correct focus point. But if you start using a large aperture fixed-focus lens and pursue a shallow depth of field effect, it is very easy to have problems.
For example, if the model is 3.5 meters away and you shoot with a 200 mm f/2. 8 lens, then the depth of field is only 38 mm! Do you still let the camera decide where this 38 mm should be focused on? What if the focus is on the mouth? The eyes may be out of focus.
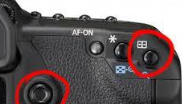
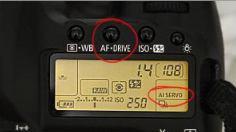
There should also be a button on the camera (top right corner of the image below) to select the focus point. The general default setting is to activate all focus points and the camera decides which one to use. Press this key, and use the direction keys to manually select the activation focus point. After selecting, when focusing, you will see that only one focus point works, not all focus points light up. Now you can focus on the model's eyes, point the selected focus point at the model's eyes and press the focus button. Now the focus point is fixed at the model's eyes, but be careful not to move the camera and the model again.
Automatic servo focusing
This name sounds very useful. Here's an example of actual shooting to illustrate: If you shoot a wedding, you stand at the end of the passage, and the new couple are coming to you, and the light is not good, so you use f/2. 8 aperture, and the depth of field is only 15 cm. Single focusing doesn't work well at this time, because the subject keeps moving.
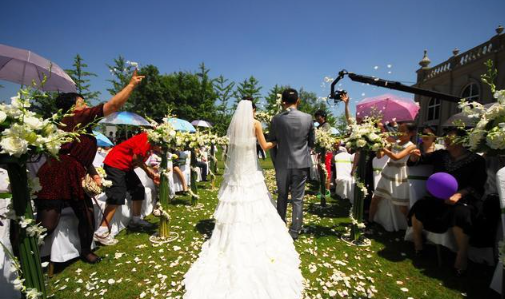
At this time, set the camera to servo focus, and the effect will be different. With this focusing mode, the camera can automatically track the model walking towards you, and always focus on the moving newcomer, no matter whether the model is approaching or walking away. Some are in the menu settings one after another, and you can also adjust the sensitivity of servo focus.

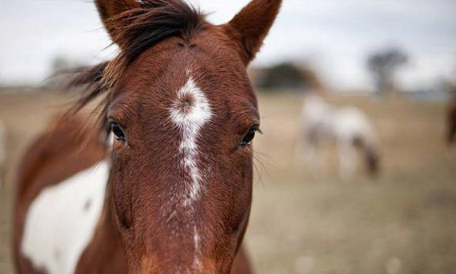
In the above photo, my father and his son are playing happily, and the background is messy. It's almost difficult to take this photo with ordinary focusing. Of course, you can shoot birds with a random gun, hoping to get a photo with accurate focusing, but what if there is none? But with a single focus point and auto-servo focus, hold down the focus key while your child rotates and track the focus. In this way, you can focus with your thumb, and then your index finger is responsible for the shutter and ready to shoot at any time.
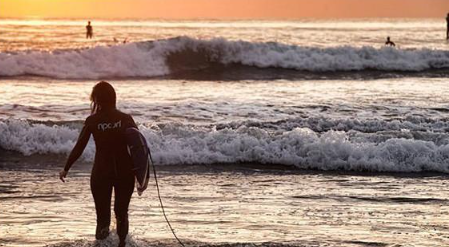
Look at the above photo taken at the beach. When she turned around to chase the waves, she took this photo just right. At this time, you can put a single focus on her back, and then use servo focus, so that the focus of the camera will always track her movement. You can press the shutter button when the most beautiful moment of the waves appears.
Postscript:
After I learned to focus with single-point auto-servo, I used this mode almost 90% of the time. Use single focus only when you have to use an auxiliary focus lamp in particularly dark conditions. If you haven't tried this little trick yet, I suggest you try it. Maybe you will be unaccustomed to it at first, but after a while, you will find that your shooting efficiency will be greatly improved, and many wonderful moments can be easily captured!