Capturing the Essence: Mastering Natural Light Photography Tips
Photography is an art form that allows us to capture moments, emotions, and beauty in ways that words often cannot. Among the various techniques and styles in photography, natural light photography stands out as a timeless and enchanting approach. Whether you’re an amateur enthusiast or a professional photographer, mastering the nuances of natural light can elevate your work to new heights. This article will guide you through essential tips and insights to help you harness the power of natural light for stunning photographs.
Natural light photography relies on the sun’s illumination, which changes throughout the day, seasons, and weather conditions. Understanding these variations is crucial for capturing the best shots. Here are some key points to consider:
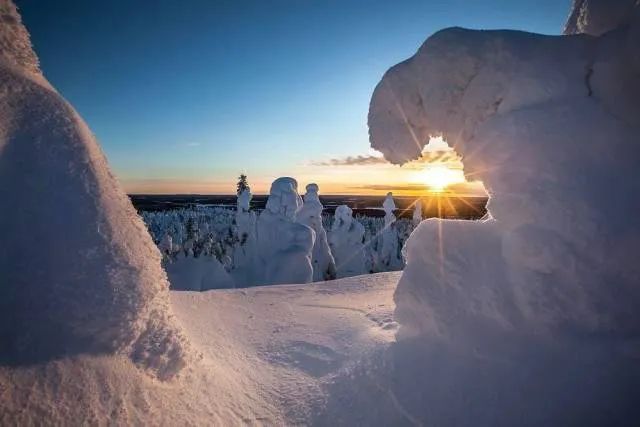
– Golden Hours: The golden hours, just after sunrise and before sunset, offer soft, warm lighting that enhances colors and creates long shadows. These periods are ideal for portraits, landscapes, and any scene where you want a romantic, dreamy atmosphere.
– Blue Hour: After sunset, when the sky turns deep blue and stars begin to appear, the blue hour provides cool, ethereal light perfect for nightscapes and cityscapes.
– Overcast Days: On overcast days, diffused light can be flattering for portraits, reducing harsh shadows and creating even illumination. However, it can also wash out colors, so using manual settings to adjust exposure is advisable.
By recognizing these different types of natural light, you can plan your shoots accordingly and make the most of each opportunity.
—
Equipment and Settings
To effectively use natural light, having the right equipment and knowing how to set it up is essential. Here are some recommendations:
– Camera: A DSLR or mirrorless camera with interchangeable lenses offers greater control over settings. For beginners, a point-and-shoot camera can still produce excellent results with natural light.
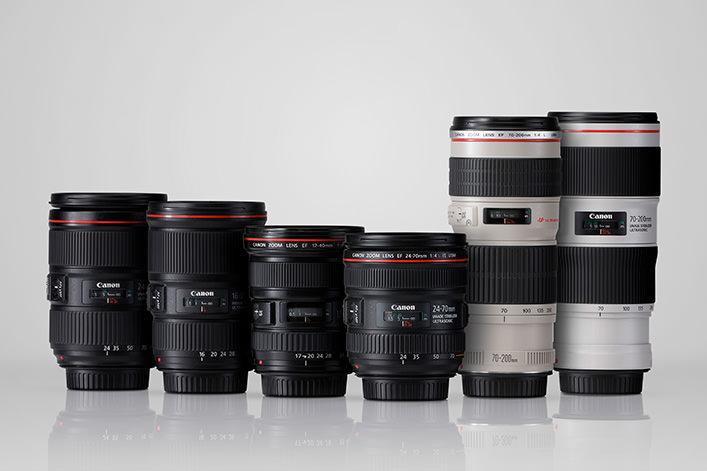
– Lenses: Wide-angle lenses (16-35mm) are great for landscapes and interiors, while telephoto lenses (70-200mm) excel in portraits and wildlife photography. Prime lenses, especially those with large apertures (like f/1.8 or f/2.8), can create beautiful bokeh effects by blurring the background.
– Tripod: A sturdy tripod helps keep your camera steady, especially in low-light conditions or when using slower shutter speeds. It’s also useful for time-lapse photography and long exposures.
– Settings: Adjust your camera settings based on the type of light you’re working with. Use manual mode (M) to have full control over ISO, aperture, and shutter speed. Lower ISO settings reduce noise, while higher ISOs can be used in dim light but may introduce grain. Aperture controls depth of field, and shutter speed affects motion blur.
Experimenting with these settings will help you understand how they interact with natural light and allow you to achieve the desired effect.
Techniques for Capturing Natural Light
Once you have your equipment ready, there are several techniques you can employ to capture natural light effectively:
Composition
– Rule of Thirds: Place your subject along one of the intersecting lines of the rule of thirds grid to create a balanced composition. This technique adds visual interest and guides the viewer’s eye.
– Leading Lines: Use natural elements like roads, rivers, or fences as leading lines to draw attention to your subject.
– Framing: Frame your subject using windows, arches, or other structures to add depth and context.
Exposure
– Shutter Speed: Use faster shutter speeds during bright daylight to freeze movement. In low light, slower speeds can create motion blur, such as silky water or streaking clouds.
– Aperture: Open up the aperture (lower f-number) to let in more light and create shallow depth of field, isolating your subject from the background. Close down the aperture for wider depth of field, keeping both near and far subjects in focus.
– ISO: Keep ISO as low as possible to minimize noise, especially in daylight. Increase ISO only when necessary in low light situations.
Post-Processing
– White Balance: Adjust white balance settings according to the type of light you’re shooting in. Daylight white balance works well outdoors, while tungsten or fluorescent settings are better indoors.
– Color Correction: Enhance colors by increasing saturation slightly without overdoing it. Adjust contrast and brightness to bring out details in shadows and highlights.
– Sharpening: Apply gentle sharpening to bring out fine details without making the image look artificial.
—
Practical Applications
Now that you understand the basics, let’s explore some practical applications of natural light photography:
Portraits
– Outdoor Portraits: Position your subject facing the light source at a slight angle to avoid harsh shadows. Use fill flash if needed to soften shadows under eyes and nose.
– Indoor Portraits: Utilize north-facing windows for soft, even light. Avoid direct sunlight entering through windows as it can create unflattering shadows.
Landscapes
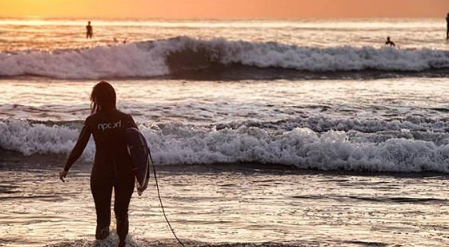
– Morning and Evening: These times offer rich colors and long shadows, making them perfect for dramatic landscape photography. Be mindful of wind direction if shooting at the beach or in open fields.
– Cloudy Conditions: Diffused light can be advantageous for landscapes, providing even illumination across the scene. Use a polarizing filter to enhance colors and reduce haze.
Architecture
– Golden Hours: The warm light of golden hours can highlight architectural details and textures beautifully. Look for interesting patterns and angles to add depth to your composition.
– Reflections: Water bodies or polished surfaces can reflect buildings and create interesting compositions. Early morning or late afternoon reflections tend to be softer and more appealing.
—
Overcoming Challenges
While natural light photography offers many benefits, it also presents some challenges. Here’s how you can overcome them:
– Harsh Shadows: Use bounce cards or reflectors to redirect light onto shadowed areas. Alternatively, position your subject so they are partially shaded to reduce harsh contrast.
– Unpredictable Light: Cloud cover can change quickly, so stay observant and be prepared to adapt your shooting plans. Carry extra memory cards and batteries just in case.
– Sensor Dust: Outdoor photography can introduce dust particles onto your sensor. Clean your lens regularly and consider using a UV filter to protect your lens element.
Conclusion
Mastering natural light photography requires patience, practice, and an eye for detail. By understanding the nuances of different types of natural light, choosing appropriate equipment, and employing effective techniques, you can create breathtaking images that capture the essence of your subjects. Remember, every photograph is an opportunity to tell a story—let the light guide you in crafting your narrative. With time and dedication, you’ll find yourself not just taking pictures, but creating art that speaks volumes. So grab your camera, head outdoors, and let the magic of natural light inspire your next masterpiece.